Sourdough (4.13.23)
|
|
Recipes contributed by Bev Barnett.
With several steps, a process that can take a day or two (mostly hands-off time), and chemistry involved, baking with sourdough can seem daunting. But fear not, says Bev, this bread is very flexible and forgiving, and once you learn the rhythm of it, baking can become an undemanding and satisfying part of your routine. The basic country loaf can be modified to include various ratios of white & whole wheat flour, and you can try using other flours, seeds, nuts, and more. A list of resources for further learning and recipes is included below, and you'll also find a guide to caring for your sourdough starter (plus some cracker recipes!). Click here to download these recipes. Want to try more bread recipes? Click here for the archive from our program in 2012. Click here for the archive from our program in 2018. |
Basic Country Loaf

Adapted from Tartine Bread, by Chad Robertson
Ingredients:
700 gms Water (80° F)
200 gms Leaven
1,000 gms Total flour
900 gms White flour
100 gms Whole wheat flour
Salt 20 gms
Instructions:
1. Prepare the leaven 6-8 hours before mixing the dough.
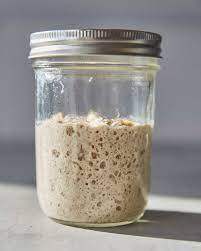
To prepare leaven, measure 1-2 tablespoons of starter into a clean glass jar.
Add 150-200 gms of water and stir. Add an equal amount of flour, preferably a blend of white and whole wheat flours, and stir. Let sit at room temperature for 6-8 hours or until the leaven has doubled in size or passes the float test. It is now ready to be used in the dough.
2. Measure the 80° F water into a bowl. Add the leaven and stir to disperse. Add the flours and stir or mix with your hands until all the flour is moistened. Let rest for 25-40 mins.
3. After the resting period, add the 20 gms of salt. If the dough seems too stiff, add additional water, up to 50 gms. Incorporate the salt by squeezing it into the dough. This is the beginning of the first rise or bulk fermentation which will last about 3-4 hours, depending on the ambient temperature. Do not rush this process.
4. During the first 2 hours of the bulk fermentation, turn the dough every half hour. To do this, dip your hand into cool water, grab the underside of the dough and stretch it, turning it onto itself. Repeat two or three more times, stretching and turning a different section of the dough. This completes one turn.
5. During the 3rd and 4th hours, continue to turn the dough every 30 -40 minutes, but do it more gently to avoid pressing gas out of the dough.
6. A well-developed dough will hold together and not stick to the container as much. It will begin to hold its shape for a few minutes after the turns. ]It should increase in volume by about 20-30% and have more air bubbles forming along the sides of the container. These are indications that the dough is ready to be divided and shaped.
Extend the bulk fermentation if the dough seems to be developing slowly.
7. Pour all dough out onto an unfloured surface. Lightly flour the surface of the dough. Cut the dough in half and flip each half so the floured surfaces are now on the counter. Fold the cut sides of the dough in on itself so the flour is sealed on the outside. Try to incorporate as little extra flour as possible during this process. Using a bench knife or your hands, work each piece of dough into a round shape, building tension in the surface as you work it. Use as few movements as possible to develop this tension to avoid tearing the surface and knocking out the gases that have built up in the dough. By the end of shaping, the surface of the dough should be smooth and taut.
8. Let the rounds rest for 20-30 minutes on the work surface. This is the bench rest.
9. To form the final shapes, lightly flour the surface of the dough rounds and flip each one over. Fold a third of the dough up and over the middle third of the round. Stretch the dough horizontally and fold each side in, over the middle. Finally, fold the top third down over all the other folds, like folding an envelope, sealing all the seams.
10. Next, make a 50/50 mixture of rice flour and white flour. Sprinkle it on a clean kitchen cloth. Lift each loaf and place on towel, smooth side down. Place dough and towel in a bowl or basket for the final rise.
11. For the final rise, leave the dough at room temperature for 3-4 hours before baking. If this doesn’t fit your schedule, place it in the fridge for up to 12 hours before baking.
12. About 30 minutes before baking, place a dutch oven in the oven and preheat to 500 degrees. If the dough is in the fridge, remove it and leave on the counter while the oven heats.
13. Turn dough out of the bowl onto a piece of parchment paper. This makes it easier to transfer the dough into the hot dutch oven. Dust the smooth surface with the rice flour mixture and score the bread. This allows the bread to expand while baking. After the oven and baking dish have preheated for 30-40 minutes, carefully open oven and lift the dough with the parchment paper into the hot baking dish and quickly replace the lid. Oven mitts are helpful in this process.
14. Reduce oven temperature to 450 degrees and bake the loaf for 20 minutes.
15. After 20 minutes, using oven mitts, remove the lid and bake an additional 20-25 minutes until the crust has a deep caramelized color. The internal temperature of the bread should be at least 200 degrees and the loaf will sound hollow when tapped.
16. Carefully remove the pan from the oven, lift out the bread and cool on a rack or lean it on its side to cool. It is important that air is able to circulate all around the loaf in order to avoid a soggy crust.
17. Let loaves cool for at least half an hour to make slicing easier. If you can’t wait, just cut really thick slices and enjoy!
Ingredients:
700 gms Water (80° F)
200 gms Leaven
1,000 gms Total flour
900 gms White flour
100 gms Whole wheat flour
Salt 20 gms
Instructions:
1. Prepare the leaven 6-8 hours before mixing the dough.
To prepare leaven, measure 1-2 tablespoons of starter into a clean glass jar.
Add 150-200 gms of water and stir. Add an equal amount of flour, preferably a blend of white and whole wheat flours, and stir. Let sit at room temperature for 6-8 hours or until the leaven has doubled in size or passes the float test. It is now ready to be used in the dough.
2. Measure the 80° F water into a bowl. Add the leaven and stir to disperse. Add the flours and stir or mix with your hands until all the flour is moistened. Let rest for 25-40 mins.
3. After the resting period, add the 20 gms of salt. If the dough seems too stiff, add additional water, up to 50 gms. Incorporate the salt by squeezing it into the dough. This is the beginning of the first rise or bulk fermentation which will last about 3-4 hours, depending on the ambient temperature. Do not rush this process.
4. During the first 2 hours of the bulk fermentation, turn the dough every half hour. To do this, dip your hand into cool water, grab the underside of the dough and stretch it, turning it onto itself. Repeat two or three more times, stretching and turning a different section of the dough. This completes one turn.
5. During the 3rd and 4th hours, continue to turn the dough every 30 -40 minutes, but do it more gently to avoid pressing gas out of the dough.
6. A well-developed dough will hold together and not stick to the container as much. It will begin to hold its shape for a few minutes after the turns. ]It should increase in volume by about 20-30% and have more air bubbles forming along the sides of the container. These are indications that the dough is ready to be divided and shaped.
Extend the bulk fermentation if the dough seems to be developing slowly.
7. Pour all dough out onto an unfloured surface. Lightly flour the surface of the dough. Cut the dough in half and flip each half so the floured surfaces are now on the counter. Fold the cut sides of the dough in on itself so the flour is sealed on the outside. Try to incorporate as little extra flour as possible during this process. Using a bench knife or your hands, work each piece of dough into a round shape, building tension in the surface as you work it. Use as few movements as possible to develop this tension to avoid tearing the surface and knocking out the gases that have built up in the dough. By the end of shaping, the surface of the dough should be smooth and taut.
8. Let the rounds rest for 20-30 minutes on the work surface. This is the bench rest.
9. To form the final shapes, lightly flour the surface of the dough rounds and flip each one over. Fold a third of the dough up and over the middle third of the round. Stretch the dough horizontally and fold each side in, over the middle. Finally, fold the top third down over all the other folds, like folding an envelope, sealing all the seams.
10. Next, make a 50/50 mixture of rice flour and white flour. Sprinkle it on a clean kitchen cloth. Lift each loaf and place on towel, smooth side down. Place dough and towel in a bowl or basket for the final rise.
11. For the final rise, leave the dough at room temperature for 3-4 hours before baking. If this doesn’t fit your schedule, place it in the fridge for up to 12 hours before baking.
12. About 30 minutes before baking, place a dutch oven in the oven and preheat to 500 degrees. If the dough is in the fridge, remove it and leave on the counter while the oven heats.
13. Turn dough out of the bowl onto a piece of parchment paper. This makes it easier to transfer the dough into the hot dutch oven. Dust the smooth surface with the rice flour mixture and score the bread. This allows the bread to expand while baking. After the oven and baking dish have preheated for 30-40 minutes, carefully open oven and lift the dough with the parchment paper into the hot baking dish and quickly replace the lid. Oven mitts are helpful in this process.
14. Reduce oven temperature to 450 degrees and bake the loaf for 20 minutes.
15. After 20 minutes, using oven mitts, remove the lid and bake an additional 20-25 minutes until the crust has a deep caramelized color. The internal temperature of the bread should be at least 200 degrees and the loaf will sound hollow when tapped.
16. Carefully remove the pan from the oven, lift out the bread and cool on a rack or lean it on its side to cool. It is important that air is able to circulate all around the loaf in order to avoid a soggy crust.
17. Let loaves cool for at least half an hour to make slicing easier. If you can’t wait, just cut really thick slices and enjoy!
Helpful resources
Tartine Bread, by Chad Robertson, photographs by Eric Wolfinger
(You can get the book through the library or check out the e-book on Hoopla!)
www.thepioneerwoman.com/food-cooking/recipes/a99341/how-to-make-artisan-sourdough-bread
(You can get the book through the library or check out the e-book on Hoopla!)
www.thepioneerwoman.com/food-cooking/recipes/a99341/how-to-make-artisan-sourdough-bread
How to care for your starter (plus cracker recipes!)
1. Keep starter in fridge unless you plan to bake bread every day. Before feeding, discard half of the starter. Feed once a week with equal parts water and flour. The amount will vary depending on how much starter you want to develop. Leave on counter for an hour or so, then return to fridge.
2. If, like me, you can’t stand to discard any starter, use it to make crackers instead! Below are links to a few recipes I’ve enjoyed:
alexandracooks.com/2022/09/11/easy-sourdough-discard-crackers-5-ingredients/
www.kingarthurbaking.com/recipes/sourdough-crackers-recipe
littlespoonfarm.com/sourdough-discard-crackers
